Today I have a mini album to share with you. The first of three! I had three vacation/trips I needed to scrapbook and I wasn't sure exactly how to tackle them. The first set of photos I worked on were from last year's vacation and I had well over 100-200 photos. After much research and deliberation, I decided on a Project Life 6x8 album and used page protectors for a snap album. I bought three different styles of page protectors and mixed and matched them throughout the album.
I started by adding all my photos in first and then went back and added in journaling as needed. This album only has embellishing on the cover page. I wanted to keep it as simple as possible, so I would finish it :)
Here are a few photos.
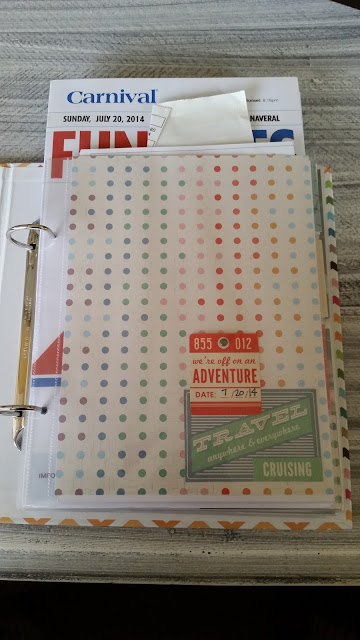
Here's my cover page, with minimal embellishing :) I used a plain 6x8 page protector for this, then on the back, I was able to stuff all of our maps and flyers we had collected.
I used several of these 4x4 page protectors throughout the album. They have an adhesive strip along one side so you can add them anywhere. LOVE them!
Now these page protectors were a little odd, but worked out great for journaling strips.
Another odd one, but the little squares worked out good for bits and pieces of journaling.
And another 6x8 page protector, for those photos I just didn't want to cut up :)
What do you do for vacation photos?
Wednesday, June 17, 2015
Sunday, June 14, 2015
My first pocket letter! (that I made)
In my last post, I shared the first pocket letter that I had received, from my friend TRACY. After I received hers in the mail, I started working on one to send back to her. I felt like it took me forever!
Here's an overall picture of the whole pocket letter.
Then a close up of the top row.
Close up of the middle row. The middle pocket there, I included a letter on the backside.
And here is a peek at the backside of the top row. I tried to include goodies on the backside or the front side.
Here's the letter, all wrapped up. I had to add a bit of extra padding to the envelope with that pencil I sent :)
And here's a look at the bottom row.
This was a lot of fun to make, once I figured out where I was going with it :)
Hope you're having a good weekend!
Subscribe to:
Comments (Atom)


