Friday, July 29, 2011

Using my funk.

Happy Friday everyone!  This is a day I thought would never get here!  For as fast as last week went, that's how slow this week has gone for me.  So happy it's Friday.

A couple of weeks ago I posted my best, surefire ways to bust myself out of my crafting funk:  HERE, HERE and HERE.  Today I want to share with you a card I made using some of my my funk :)  When I go to craft a card, it makes it so super easy to whip one up when I have one of these embellishment pieces already made.  Seriously, this card took minutes to make!


I stamped my favorite Hero Arts flower in Momento Tuxedo Black ink onto the craft paper, added my embellished tag on some foam dimensionals and then added my sentiment.  Doesn't get much easier than that!

So, what's going on with you this weekend?  Abie is taking a painting class this weekend and then we're having snack night Saturday night, always a family favorite at our house.  It's supposed to be a teensy bit cooler, so maybe some swimming too.

Thank you for coming by today and I want to tell you all how much I appreciate your kind and thoughtful comments.  Some of you comment every day and we've grown to be good friends :)  Have a super funtabulous Friday and I'll see you on Monday!

Thursday, July 28, 2011

Happy Birthday Mom, lunchbox notes and a little caddy!

Today is my mom's birthday.  I don't think she'll be reading this because her and my dad are on the Harley, on yet another adventure.  But, just in case she is...Happy Birthday Mom!

I want to share with you a GENIUS (I'm being halfway sarcastic here) idea I had.  Now if you've read my blog for awhile, you know I like to send little notes in Abie's lunchbox.  The other night I was crafting the midnight oil when it hit me, why not use my brown paper bags?  She IS going to be a big time fourth grader this year, which I'm slowly coming to grips with .  I thought something a bit more grown up was in order for her fourth grade lunch box notes.


I stamped right on to the bag and added some yummy twine and then trimmed my card stock down to 2 1/2 x 4 1/4.  I rounded the edges and it slid perfectly into the paper bag so my messages can be hidden :)  Now if Abie wants, she can keep the card somewhere safe and reuse the paper bag for a friend.  She'll just have trim a new piece of card stock!  I left this bag pretty simple, especially compared to some I've made in the past.

Up next I want to share with you my new organizational caddy.  Last weekend I was on Two Peas and reading a thread about caddies  and someone posted pictures of one of the Making Memories carousel caddies and I couldn't believe how much it held.  I had been using this caddy for the last several years and I thought it was fine.


Later that weekend, I ran to Michael's and guess what?  All their scrapbook storage was 50% off and they had ONE of their caddies left that looks just like the Making Memories one.  (I wouldn't have bought it at full price)  It was just meant to be :)


Seriously, check out how much this thing holds, and I still have room for more!  Definitely a good buy for $19.99!

Have you bought any fun organizational things lately that you were surprised by?  Have a fun Thursday and I'll talk with you all tomorrow.  Thanks for coming by today :)

Wednesday, July 27, 2011

CFC #12

Welcome Wednesday, why do you have to be so hot?  We are still stuck in this hot, hot heat with extreme heat indexes up to 115 degrees.  Not too much you can do in that heat, right?  But you can craft!  This week I'm playing along with Casual Fridays Challenge and the challenge this week was to use rub ons.  I have a bunch of rub ons and NEVER use them so this really was a challenge for me.


These particular rub ons I picked up at Big Lots several years ago and let me tell you, sometimes there's a reason why things are at Big Lots.  Haha!  These rub ons are American Crafts and I don't know if they were a bad batch or what but they are really crappy :)
Enjoy your Wednesday.  Thanks for coming by today and I'll see you tomorrow!

Tuesday, July 26, 2011

Another art journal page.

Good morning to you!  I have to say that my Monday flew by.  I was super busy yesterday and had every intention of getting some crafting in when I got home.  Well, that didn't happen.  Always seems to happen that way, doesn't it?  :)

Last week I posted about my little foray into art journaling and STEPH sent me the link to a website that was just starting up a weekly challenge.  You can check it out HERE.  It's 23 weeks long and I wasn't sure if I would be able to play along every week so I didn't actually join up, I'm just playing along from the sidelines :)  I thought I would play along when I could and share my journal pages with you guys!  The first weeks challenge was to spread your wings.  You had to create a free spirit spread, two pages, using the concept of wings.  Well, I only created a one page spread :)  See good thing I'm sitting this one out from the sidelines, huh?


I had so much more fun with this one than last weeks.  I just brushed on some acrylic paint and then added glitter, stamps and punched butterflies.  Super quick and easy.  It could even pass as a mini layout!

I'm still not sure about this art journaling thing, we'll see.  It's definitely a work in progress, like me.  Hope you have a GREAT Tuesday!  Thank for coming by today and I'll chat with you tomorrow!

Monday, July 25, 2011

My new favorite color.

Happy Monday all!  Can you believe it's the last Monday in July?  This summer has, sadly, flown by here.  In fact, we bought Abie's school supplies over the weekend...tear.  Enough about that though.  I want to talk about my new favorite color today.  It's a a light aqua or robin's egg blue.  I fell in love with in a few weeks ago and I just can't stop thinking about it. 


I would LOVE to paint our kitchen that color, but I think it might be a bit much.  Plus it would take a massive amount of effort on my part to Mike on board with it and I would rather use my energy for other, more crafty things at the moment ;)  Like the card I made, totally inspired by this color!


Now those labels are really cool.  I found them at Michael's on clearance for $1.49 and there were 12 in the package!  I'm thinking I might need some more, you know after using one realizing how much I loved it!  As for the sentiment, I heat embossed it with my favorite bright red Zing embossing powder on some old book paper.  Loving how that turned out too!  I was slightly afraid that the heat gun was going to catch that old paper on fire though.  Although I'm sure it wouldn't have been the first time Shakespeare was burned.  Haha.  I love the red and yellow paired up with this beautiful blue color.  I'm not sure there's any color that would look bad against this as it's backdrop.  What do you think?

Did you all have a nice weekend?  It was so HOT here on Saturday.  We cleaned the house up and then did some shopping, swam and then had a picnic/movie night.  On Sunday it was laundry and crafting.  Perfect!

I hope you have a wonderful day and thank you for coming by today.  See you tomorrow!

Friday, July 22, 2011

Art Journaling

So I had this post scheduled to go up Thursday morning and couldn't figure out why it wasn't up.  I checked when I got home last night and realized I had saved it as a draft.  Duh!  Sorry about that friends!  So, what I had planned for today, I'll post next week, okay?  Okay!

Today I wanted to talk about art journaling.  I've heard this term thrown around a lot, but never really understood the concept until last Friday when I read 
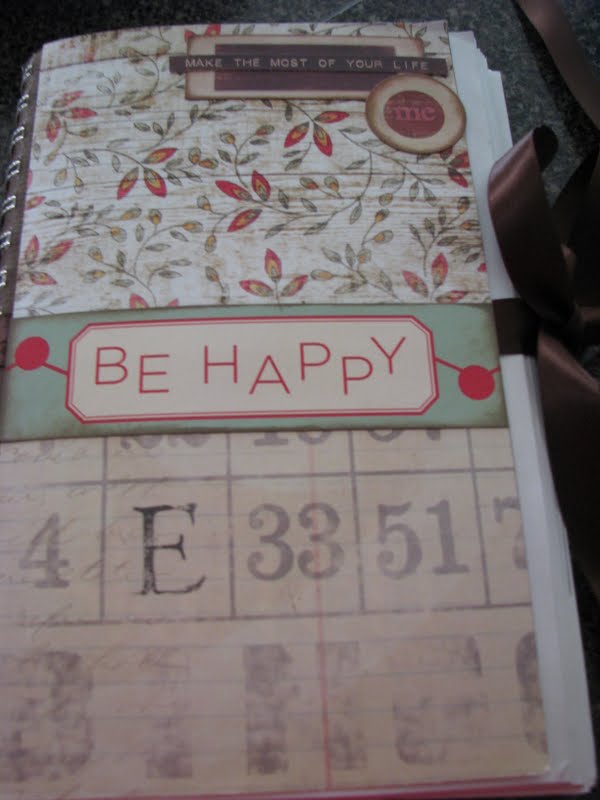
SUE'S BLOG.  She posted a link to an article about art journaling and it finally clicked with me.  I about smacked myself in the forehead.  Duh Becky, why didn't you get this before?  It's basically drawing, sketching, stamping, collaging (is that even a word), or any other technique that strikes your fancy, into a book.  Just make sure you leave some space to write.  Then you journal, about your day or your week or I guess how ever often you feel like it.  I thought it would be really cool to try out.  I didn't want to invest any money into a new journal so I thought I'd try this out in my faux SMASH journal.  I've posted about that before HEREHERE and HERE.  I thought this might be kind of a cool thing to add to it anyway, right? Right!  Now I must warn you, my creative craftiness lies in the paper arena NOT drawing, BUT that is not what the spirit of art journaling is about my friends.  It's about letting yourself be free, just to create!  So without further ado...my first art journal pages.


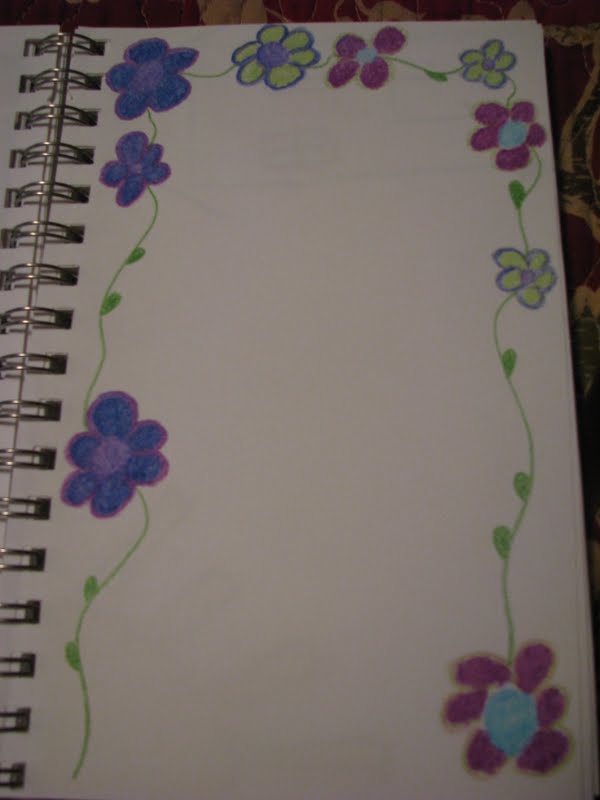
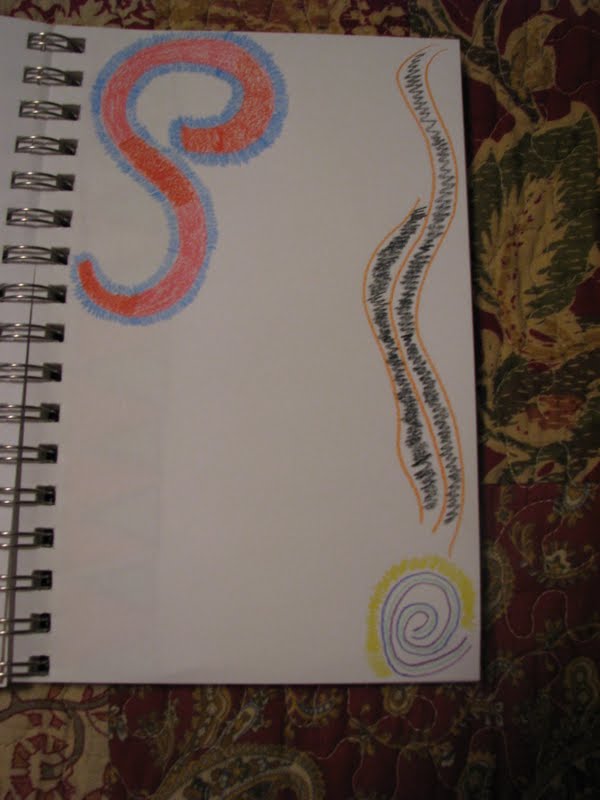
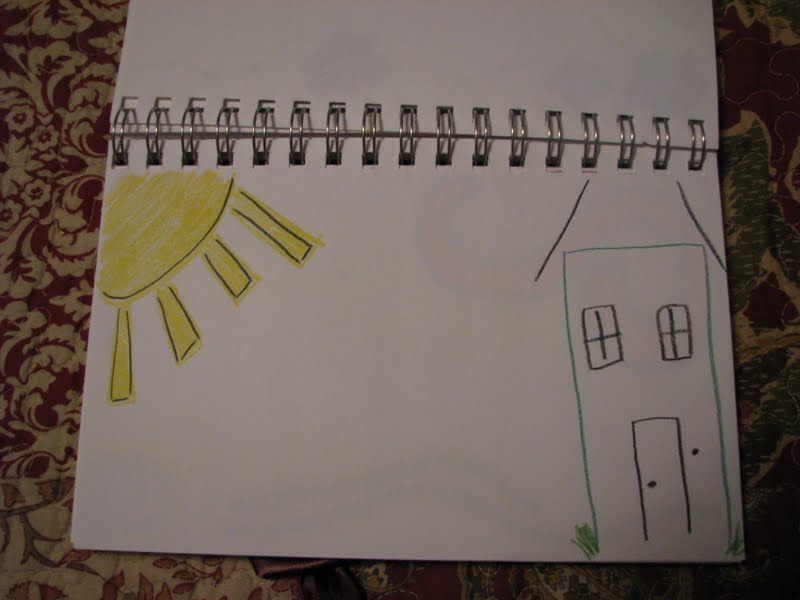
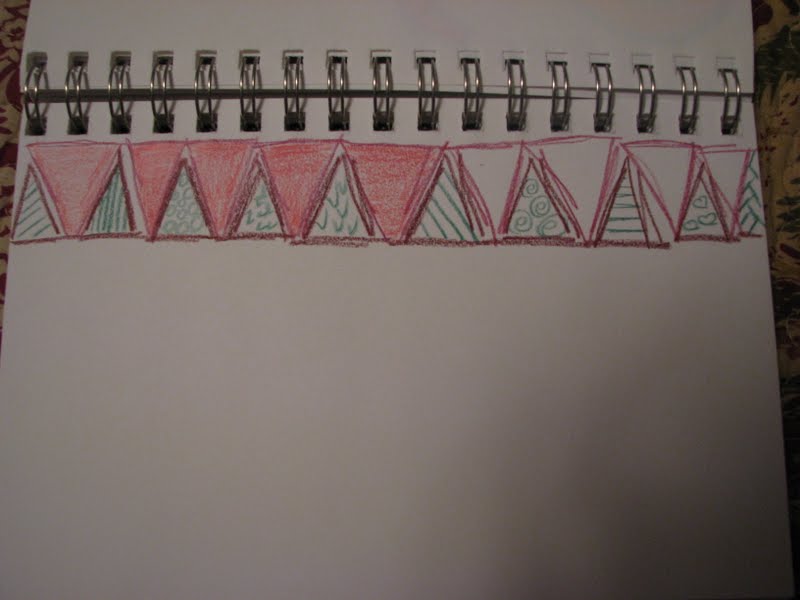
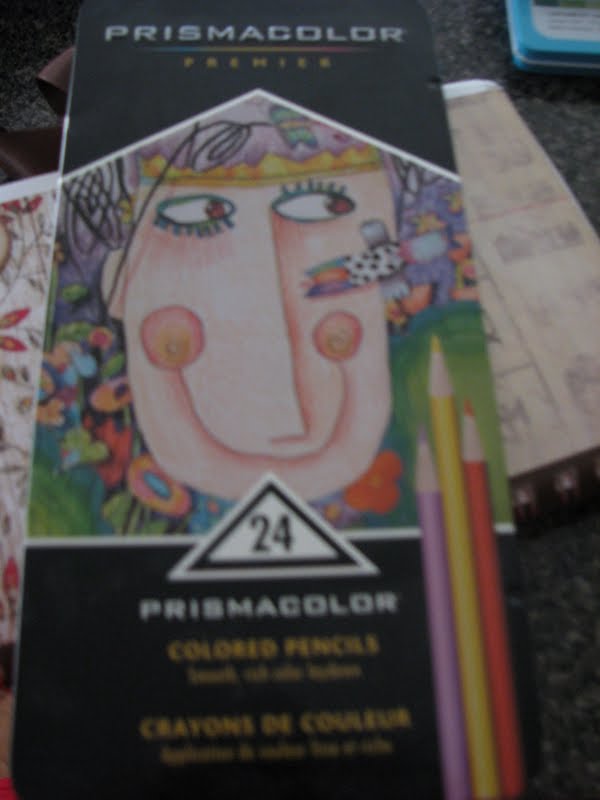
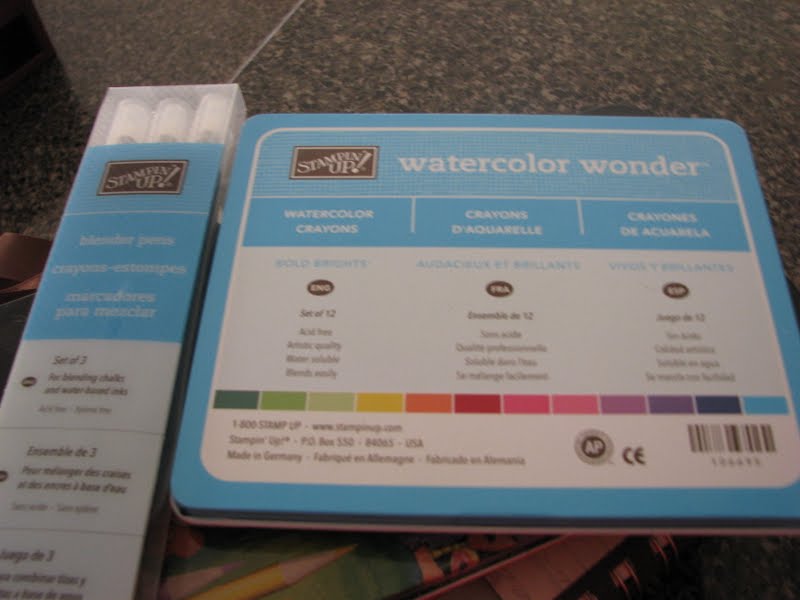
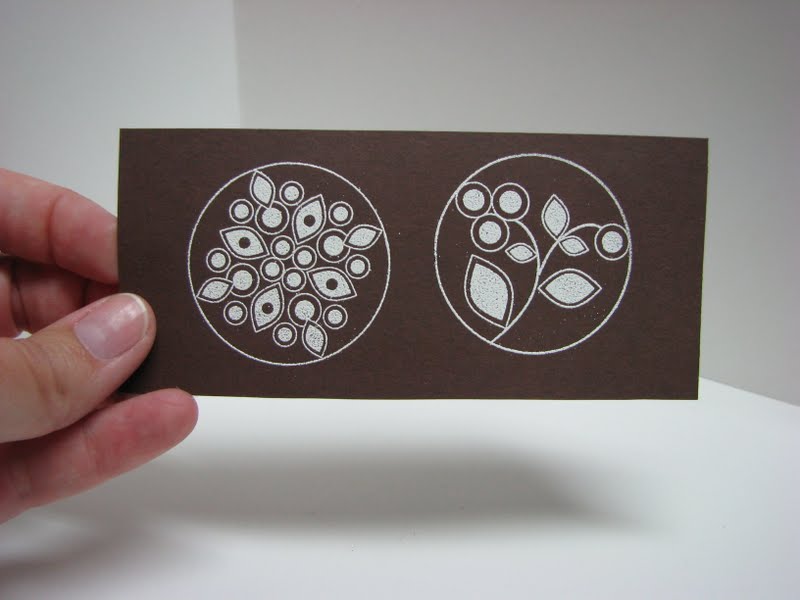
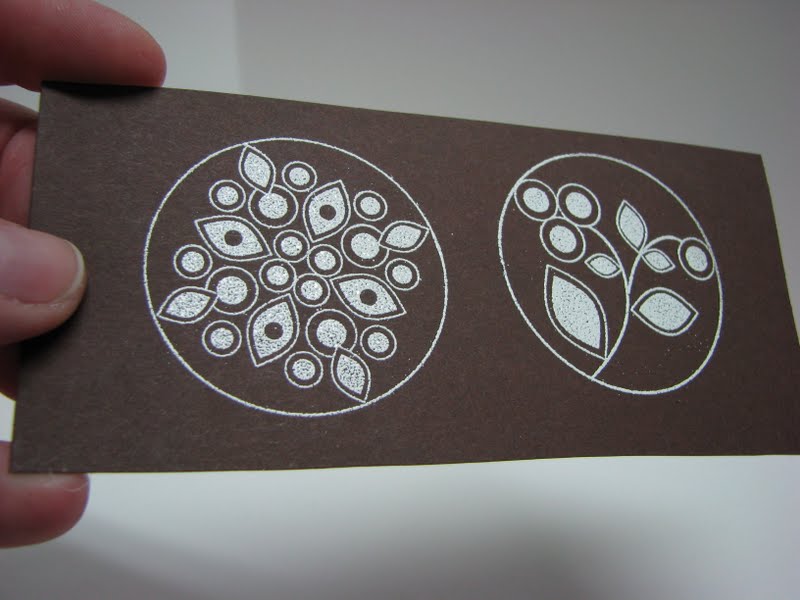
The first picture I used my Stampin' Up! watercolor crayons and blender pen all the rest I used my Prisma Color pencils.  Some pros and cons for me of this process...  I really liked just being crafty and getting to play with color.  It was nice to have something portable to play with.  All my tools fit in my lap.  The cons for me were that I had a hard time with the flow.  This was something really outside of my box and I had some difficulties with it, but I think it was good for me.  I'm going to keep at it and see where it leads me :)

Have you art journaled before?  How is/was the process for you?  I would LOVE to hear about it.  Side note:  I'm feeling the urge to shop right now, but want to wait for all the new CHA stuff coming out right now.  Anyone else feel this way?

Okay, what's up for your weekend?  We don't have anything planned.  It's supposed to be HOT again, so maybe some pool time or a movie night is in order.  I definitely need to get crafty, lots of cards and projects on my to do list!  Thanks for coming by today.  Have a GREAT, GREAT Friday and weekend and I'll see you on Monday!

Wednesday, July 20, 2011

A hodge podge of a Wednesday.

Good morning dears!  I have a hodge podge of photos and things to discuss with you today.  I worked late last night and after a quick dinner I had no time for craftiness :(  But we DID get the girls table finished, which was a priority!  :)  Let me tell you, we made them wait upstairs while we finished it up and they were so excited when we called them down.  They both had their eyes closed, so cute!


Here's Landry, getting down to business...coloring :)


Here's Abie...organizing her new area :)

Now for some not so crafty stuff.  Last week while we were on vacation we went to a few antique stores and flea markets.  I've been on the look out for a floral frog to hold my cards and projects for when I take pictures.  I've found a few online, but shipping is SO expensive.  Well, the first antique store we went into, I found one!


Sorry about the picture here, didn't realize I had focused in on the cabinets :)


This was my other cool find!  I love this old fish scale.  It's going somewhere in the kitchen, just not sure where yet...

Now onto a preview for tomorrow:


Hint #1 my colored pencils.


Hint #2 my faux Smash book.


Hint #3 my watercolor crayons and blender pens.

Any guesses on what I'm up too?  Come back tomorrow and I'll show you.  Have a wonderful Wednesday and thanks so much for coming by today!

Tuesday, July 19, 2011

Let's talk desks!

Hello Tuesday!  Today I thought we would discuss desks, or tables or whatever you call your work space.  I use to be a sitter but have since converted to a stander.  I fell in love with THIS table but good grief, not the price!  That's when I turned to the power of the Peas and found THIS table at a fraction of the cost!  It didn't take me long to get this puppy made (and by me I mean Mike). 


Now this desk is awesome!  I love it.  I bought two Closet Maid 9 hole cubbies from Target and had a piece of MDF cut to 38x55.  I painted the MDF to match the cubbies and Mike attached the tabletop to the cubbies with a couple of L brackets.  This came together in one night, so easy!  I posted pictures of this desk back several months ago, HERE when I did a post on my whole craft room.

The real reason I wanted to talk about desks today is because Mike and I are making a second craft desk for my room.  This time for the girls.  Abie has her own area in my room, but Landry is quickly out growing her little easel table.  So it was time for a little bit of rearranging.  I got to thinking about things, like I like to do :)  and decided on a crafty desk/table similar to mine for the girls.


We picked up two of these three shelf bookcases at Walmart, for just $12.50 each!


Mike already had this piece of plywood in the basement.  ***This picture is unfinished***  After I took the picture, Mike trimmed the wood down, just a bit and painted the tabletop.  While it dried, the girls and I separated Abie's beads out by color, theme and alphabet ;)  I'm so excited that in just a few more days they will have a LARGE work space, just for them!  Bring on the glitter!

I'll be sure to keep you posted on the desk/table and show you pics once the girls are all settled.  Have a great Tuesday friends and I'll see you tomorrow!  Thanks for coming by today!

Monday, July 18, 2011

Wedding Card

Happy Monday everyone!  Did you have a nice weekend?  We just played catch up from being gone on vacation all last week.  Laundry, grocery shopping, the usual :)

I did fit a little crafty time in, priorities right?  I needed a wedding card for my boss.  He was married on June 24th and then was on his honeymoon through July 8th and then I was on vacation so today will be the first day I have seen him.  They were married in a friend's backyard, a small family ceremony, but I felt like I wanted to at least make him a card.


This card measures 4x8 1/2 so it's a long skinny one and I love the way it turned out!  I added another one of those Crate Paper Accent Cuts and a bit of Crate Paper Emma's Shoppe.  I layered on some vintage trim and few more bits and pieces here and there.  Definitely not your traditional wedding but I think that's what I really like about it.

We're planning on making a new craft table for the girls.  I'm hoping this week sometime, not sure if Mike's schedule will allow for that to happen or not ;)  We're also having some super hot temps here and it's pretty miserable to be outside right now.  I don't mind the hot weather, but this humidity is awful!

Have a fabulous Monday my friends.  Thanks for coming by today and I'll chit chat with you tomorrow!

Friday, July 15, 2011

A tiny little card.

Happy Friday my lovelies!  I hope you've had a wonderful week.  Today I want to share with you a fun little card.  Last week I made a 4x4 card and wondered why I don't make more that size, but today's card is also a fun size that I should make more of.  It's 2 3/4x4 1/4


I've had that alphabet paper for four years!  Talk about holding on to something.  I just love it though and only use bits and pieces of it at a time.  I painted, yes I said painted, around the edges of the card.  How's that for an oldie but goodie?  Don't ask what got in to me.  It's a look I've always loved for aging something though.  Not sure what I'll use this for, but I think it sure is a cutie :)
Do you have big plans for your weekend?  We're just going to relax, probably do a bit of laundry and maybe craft a bit.  I hope you have a wonderful weekend and I'll see you soon!  Thanks for popping over here today!

Thursday, July 14, 2011

Embossing with white powder...ugh.

So I love, love, love the look of heat embossing.  Especially with white powder, on dark colors.  My issue is when the tiny little powders stick to the paper where they're not supposed to.  Do you know what I mean?  Let me take you through my embossing process.

1)  I rub my Embossing Buddy over the area to be embossed.
2)  I stamp my chosen stamp with Versamark Ink over the area I just prepped.
3)  I sprinkle the stamped area with Ranger Sea foam White embossing powder (my favorite).
4)  I gently tap excess powder off and give my paper a flick or two with my finger.
5)  I use a soft brush to clean up any edges or get rid of any flecks of pesky powder (see opening paragraph)
6)  I heat up my powder
7)  I get slightly frustrated because there are stray white powders in my image and it's not as crisp as I     
      would like.


You can really tell in the first picture, not as much in the second.  These aren't too terribly intricate, at least not compared to some, designs, but there is a fair amount of detail.  I would just really like a cleaner result.  Any tips or suggestions?

Now yesterday, Mary Pat at Siehled With a Kiss made THIS card with the most amazing butterfly stamp on it.  She embossed it with white embossing powder as well and said she rubbed her cardstock with a dryer sheet first!  When she told me that, I about smacked myself in the forehead!  I'm so going to try that!  Thanks Mary Pat!

Do you have a technique that you love, but that frustrates you at the same time?  How do you deal with it?

Have a great Thursday and I'll see you tomorrow!  Thank for coming by today :)

Wednesday, July 13, 2011

Vacation Albums

Oh man, already Wednesday!  I can't believe it.  These weeks are flying by.  Before we know it we'll be talking back to school, ugh.  I love summer and I just can't bear the thought.  While we're still here though, let's discuss vacation albums.  I've done three.  One 12x12, your traditional album, one 8x8 also traditional and one two up album.  I've seen a lot of non traditional albums this year and I really thought I would try my hand at one this year.

I've had this Cosmo Cricket blackboard album for several years now, not knowing what I wanted to use it for...until today!


I'm going to use two different sized manila envelopes and alternate them between the chipboard pages.  This is as far as I've gotten :)  Now bear with me as this will be a work in progress.  It could be MONTHS before this album is complete :)  A lot of people are taking their albums with them, on the road.  I didn't have time to get my stuff together this year, but would have loved to do that.  Maybe next year, right?  I did get Abie a Smash Book so she could document vacation this year :)

Do you do a separate vacation album or do you include vacation layouts within your regular scrapbooks?  If you do a separate album, what kind are you doing this year?

Enjoy your Wednesday and your summer, savor it my friends.  Thanks for coming by today.

Peace out.

Tuesday, July 12, 2011

Last Day of Funk!

Happy Tuesday!  I have a quick post for you today, with a blurry picture :)  Have you been feeling funky lately?  If so, scroll down to my previous two posts and see my funk busting craft moves!  I have one more trick for you today!

Do you ever get roped in to buying those little tag books that match the paper pads?  I've only bought one, but have contemplated buying more than that!  They're just so adorable.  Well, I usually use these as journaling spots but this time I made a little embellishment/tag out of one!

(insert blurry pic here)


So if you've ever bought these tag books before, you know there's a GIGANTIC hole in one end.  I simple covered it up with one of my stick pins (remember when I made these?) and a butterfly, popped up on a foam dimensional. 

Now this can be used on a gift bag or a card.  But I think I might just sit and stare at it for awhile.  Haha!

Have a fantabulous Tuesday!  I'll see you tomorrow and thanks for stopping by today!

Monday, July 11, 2011

More Funk Busting!

Good Monday morning all!  Did you have a nice weekend?  I'm back today with some more funk busting tips!  Last Friday I shared with you my best tip for busting the crafty funk.  For me it's making something small like a tag.  I know a lot of people will make a card, but when you're primarily a card maker...you have to go even smaller than that! 

Today I'm going to show you some small little doilies that I've embellished.  I originally saw this idea on Dawn McVey's blog, some time ago.  These are Martha Stewart cut lace tags that I picked up at Michael's.  I don't think they sell them anymore but Papertrey Ink now sells a die that cuts out an almost identical shape!


In the first two pics, I just layered on a few bits and pieces.  In the last picture, I used a regular sized doily and just cut it in half, then layered it up.

I love these embellishments, I can use them for gift tags, cards, scrapbook pages just about anything.  The best part about them is that I feel crafty when I'm making them!

Have a wonderful Monday and I'll see you guys tomorrow!  Thank for popping in today!

Friday, July 8, 2011

Funky Friday :)

Good morning!  How are you?  I want to talk funk today.  Not smelly funky, not Funky town, not even George Clinton Funk.  I mean crafty funk.  The other day STEPH was talking about being in a funk and asked what we all did to get out of it.  I told her that I will create something small like a tag, a set of doilies, or some embellishments.  The best part about this is that when you're done, you can always use what you've just created on a card or scrapbook page. 

Now, I haven't been in a funk lately, but after talking to Steph, I was kind of in the mood to make some small little ditties.  So the next few days I'll be sharing them with you.  First up, a mini paper bag.  These are so much fun to decorate.  I picked mine up at Michael's but I know Hobby Lobby sells them too.


I just love these little bags!  I think this one might work well for a birthday package :)

Well, I'll be back on Monday with some more funk busting crafts!  Have a fabulous weekend friends and thanks for stopping by!